

Configure Storage Profiles
Storage profiles define named storage tiers that users select when creating VMs. Each profile maps to specific storage pools in each zone and can enforce read/write I/O limits. This lets you offer different performance tiers (fast NVMe for production, slower HDD for archives) without exposing the underlying Proxmox storage topology to users.
Manage storage profiles from the Settings page in the portal. The Storage Profiles section shows all configured profiles with their zone mappings and bandwidth limits.
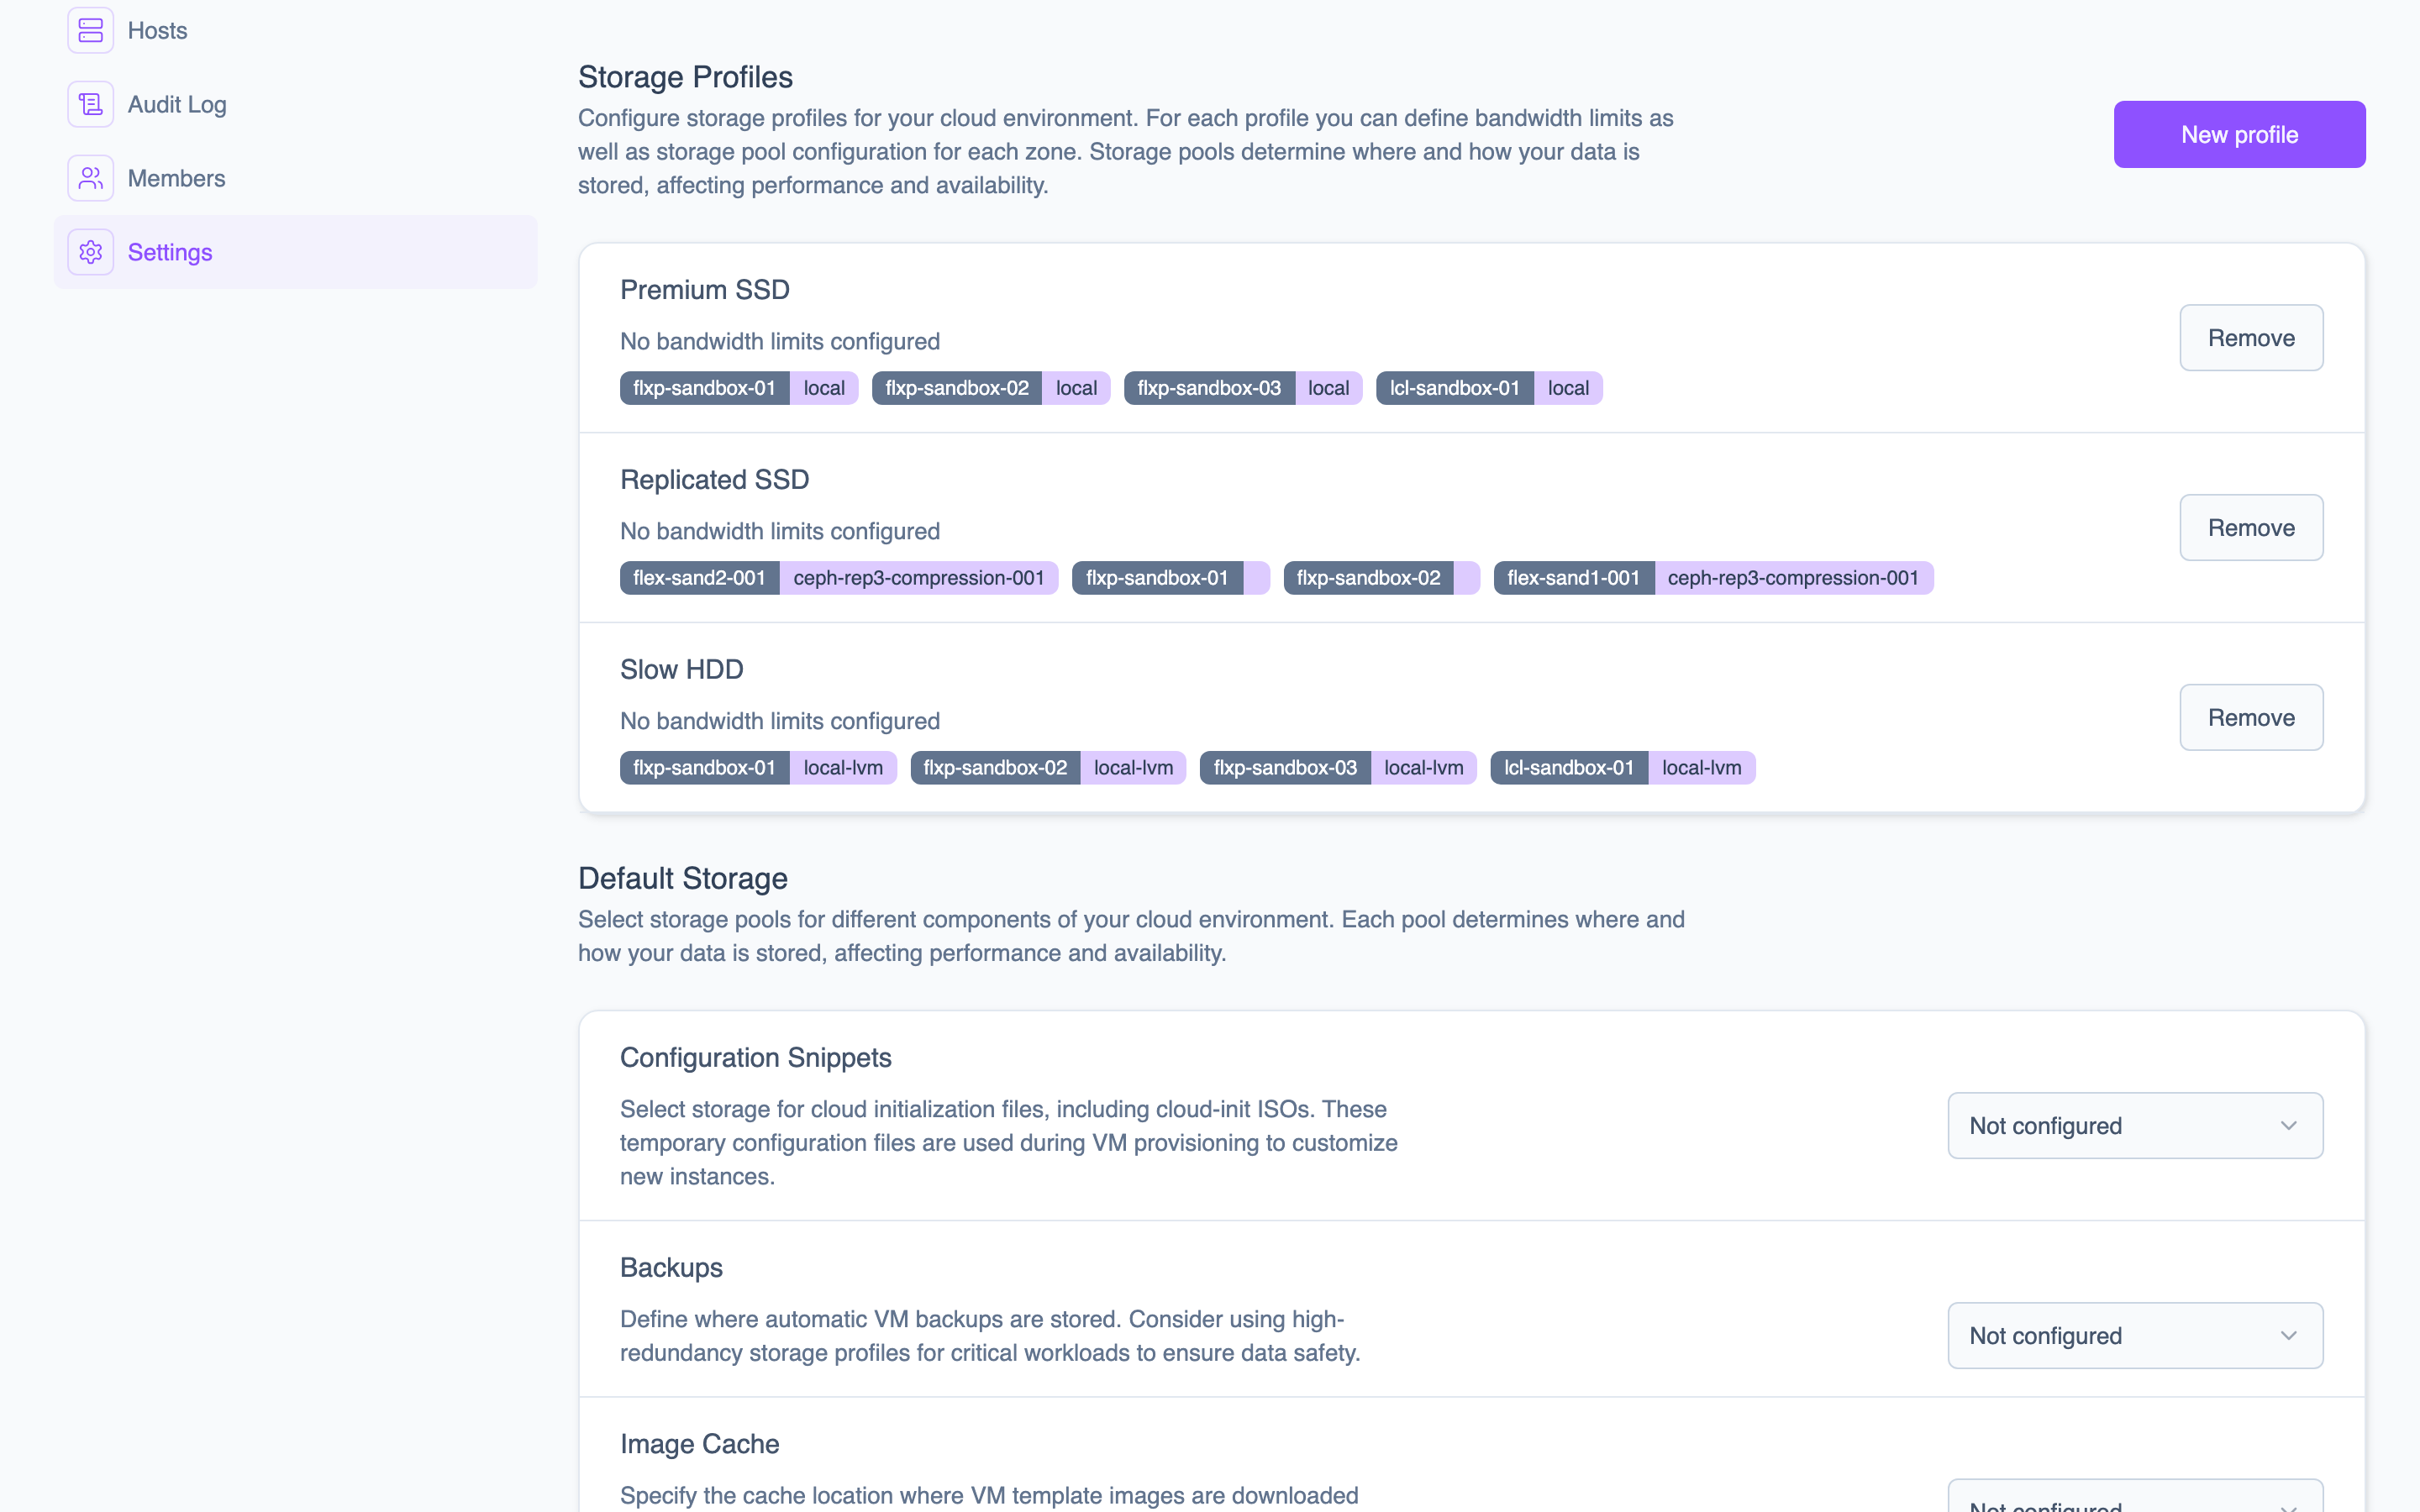 The Storage Profiles section displays each profile's name, bandwidth limits, and zone-to-storage-pool mappings.
Add a profile
A storage profile requires:
| Parameter | Description |
|---|---|
name | A descriptive name for the tier (e.g., "NVMe Fast", "Standard"). |
mappings | One mapping per zone, linking the profile to a Proxmox storage pool. |
readLimit | Maximum read throughput in MB/s. Set to 0 for unlimited. |
writeLimit | Maximum write throughput in MB/s. Set to 0 for unlimited. |
In the portal:
- Navigate to Settings.
- In the Storage Profiles section, click New profile.
- Enter the profile name.
- For each zone, select the storage pool to map to.
- Set the read and write I/O limits.
- Click Save.
A typical setup with two tiers:
| Profile | Pools | Read | Write |
|---|---|---|---|
| NVMe Fast | local-nvme / ceph-ssd | 500 MB/s | 250 MB/s |
| Standard | local-hdd / ceph-hdd | 100 MB/s | 50 MB/s |
Remove a profile
To remove a profile, click Remove next to it in the Storage Profiles section. Removing a profile does not affect VMs already using that storage tier. It only prevents the profile from being selected for new VMs.