

Create a Virtual Machine
Spinning up a virtual machine in flex.plane takes a zone, an OS image, a compute profile, a storage profile, and at least one network. You can let the scheduler pick the best host or pin the VM to a specific one.
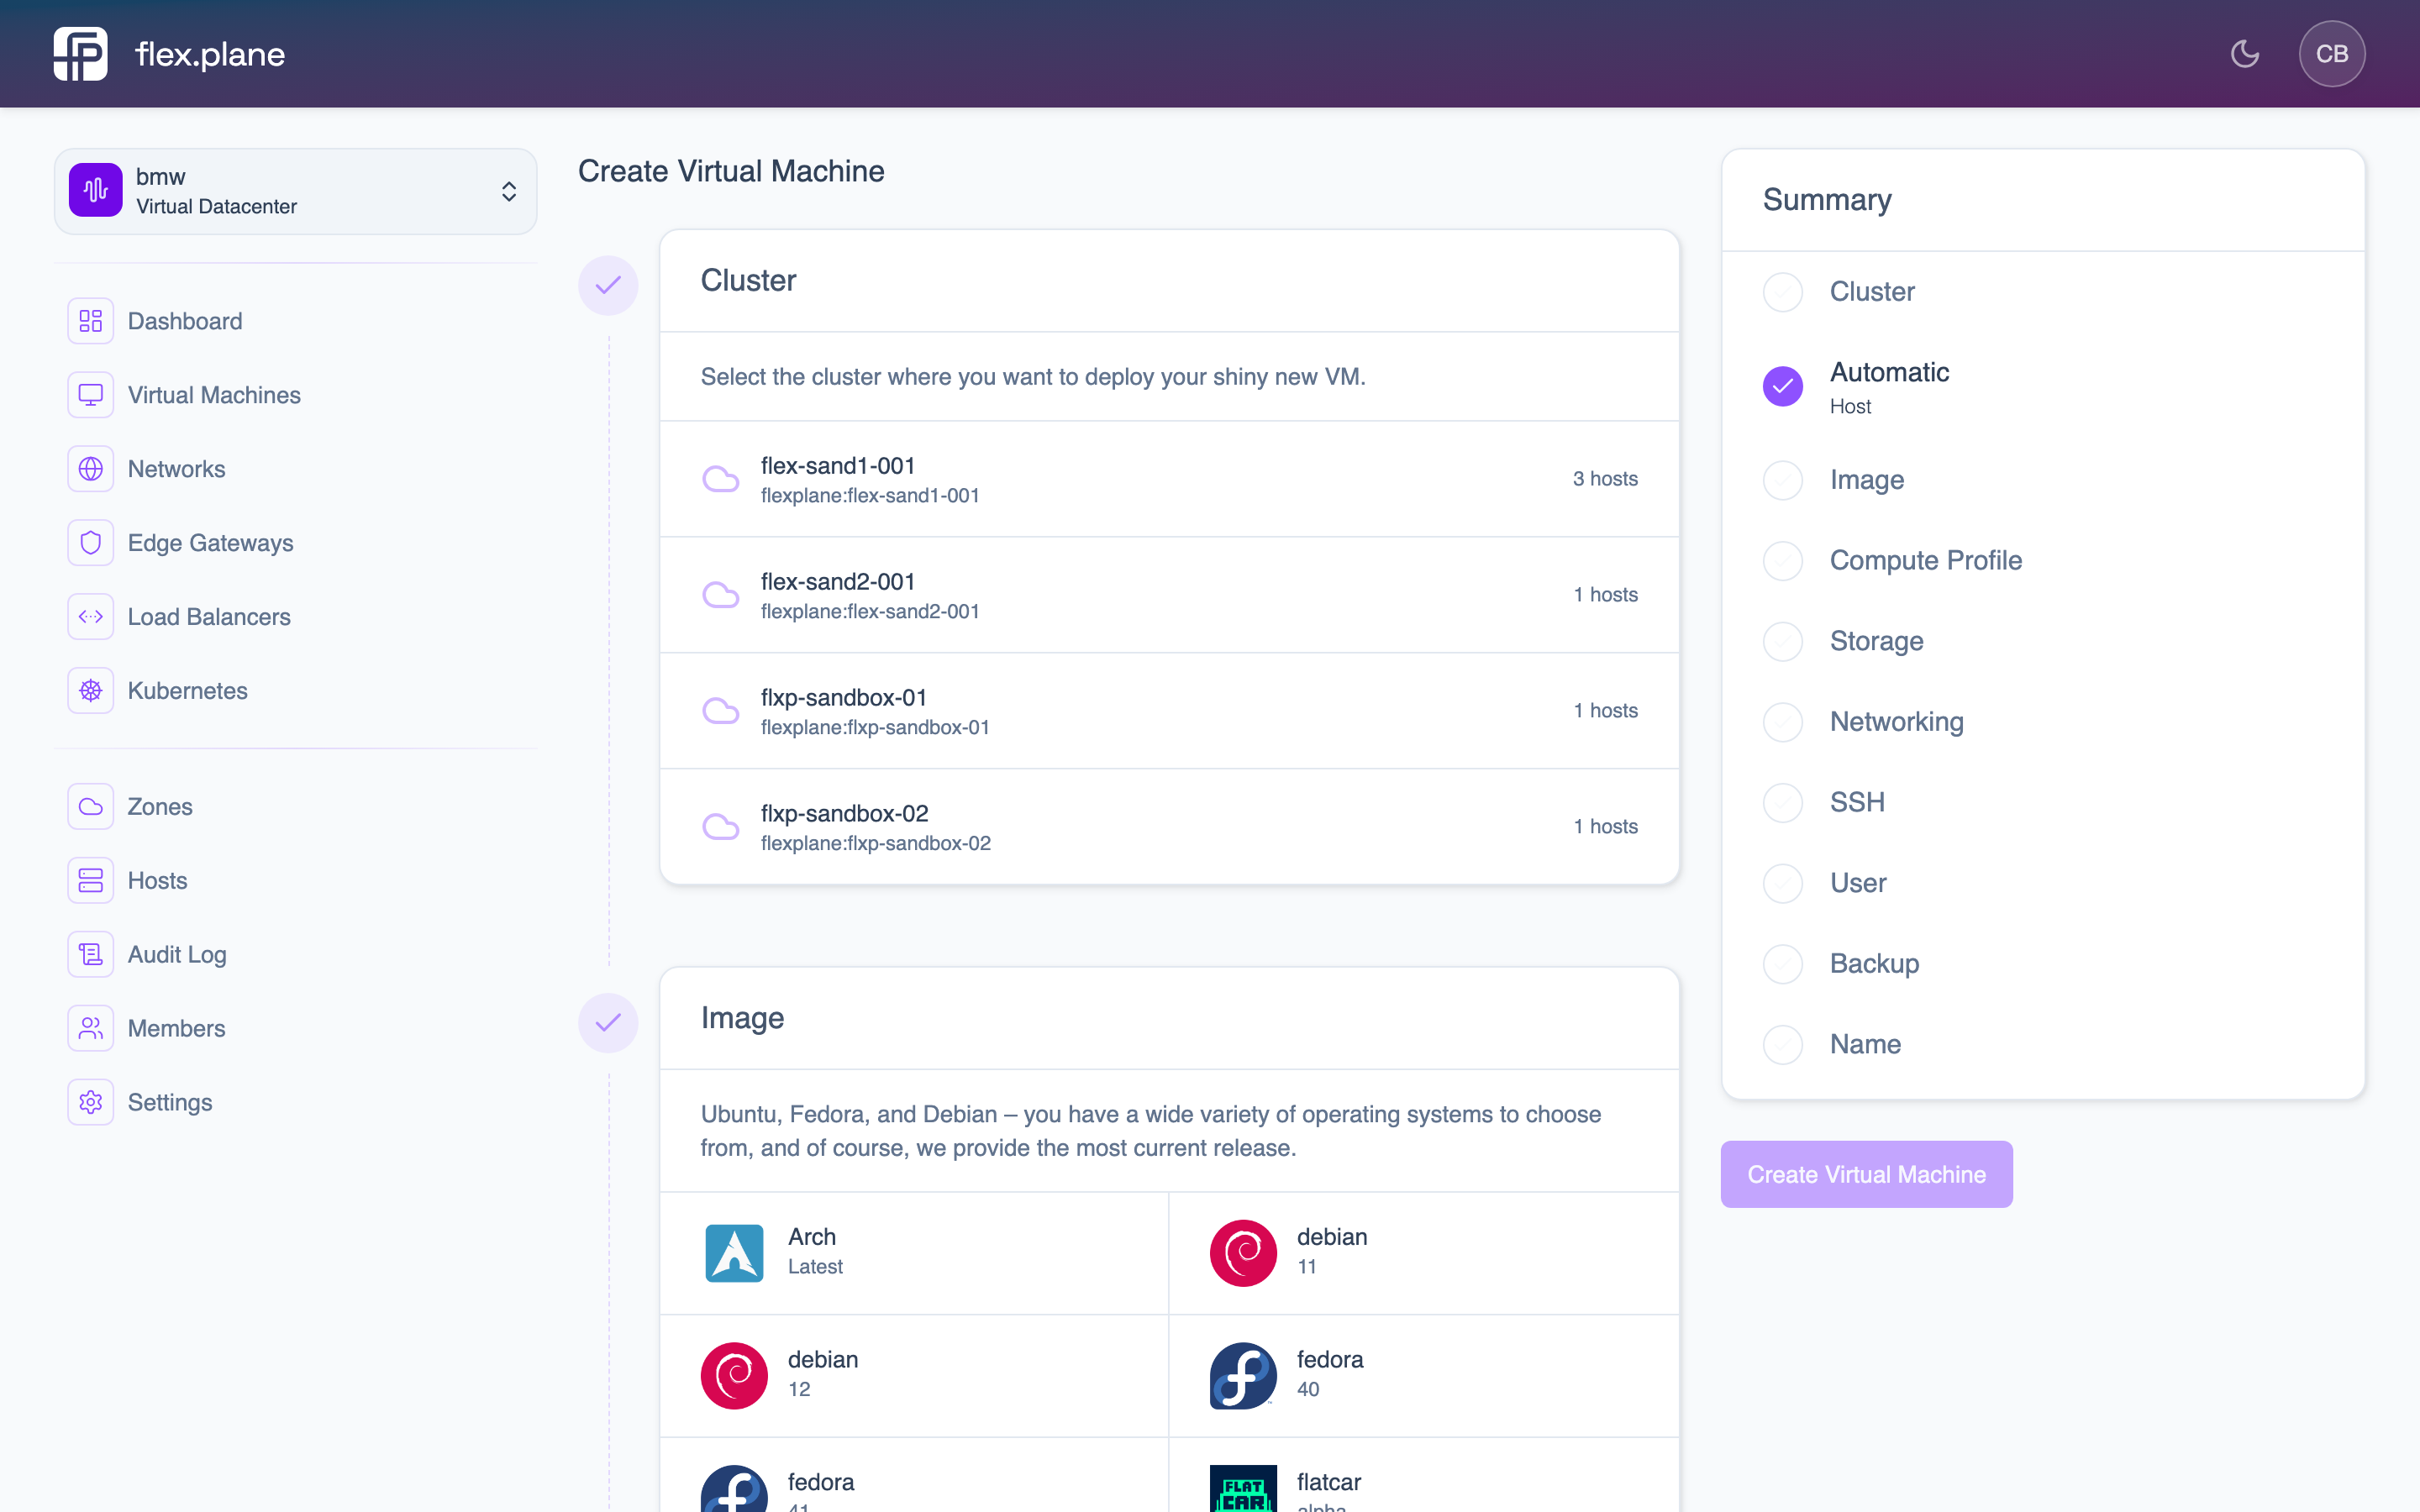 The VM creation wizard guides you through selecting a cluster, OS image, compute profile, storage, networking, and access credentials.
Choose your configuration
Every VM requires four building blocks:
- Zone: the availability zone where the VM will run.
- OS image: the base image for the VM (Ubuntu, Debian, Rocky, etc.).
- Compute profile: defines CPU and memory allocation (e.g. "Small" = 2 vCPUs / 4 GB RAM).
- Storage profile: defines the disk tier and I/O limits.
You also need at least one network to attach the VM to. Each VM supports up to 4 network interfaces.
Set access credentials
Every VM needs initial access credentials so you can log in after creation:
- user: the username for the default account.
- password: the password for the default account.
- sshPublicKey: an SSH public key for key-based authentication.
Add extra disks
Beyond the boot disk that is created from the OS image, you can attach additional data disks at creation time. Each additional disk requires:
- A storage profile to determine the disk tier.
- A size in gigabytes (minimum 1 GB).
Additional disks appear as block devices inside the VM. You will need to partition and format them after first boot.
Configure cloud-init
For advanced provisioning, you can pass custom cloud-init data. This gives you full control over:
- user: custom cloud-init user-data (YAML).
- network: custom cloud-init network config.
- meta: custom cloud-init metadata.
Cloud-init runs on first boot and can install packages, configure services, write files, and more. If you do not provide cloud-init data, flex.plane uses sensible defaults based on the credentials you specified.
Launch the VM
In the portal, the creation wizard walks you through each step: cluster selection, OS image, compute profile, storage profile, networking, SSH keys, user credentials, backup preferences, and a final name. A summary panel on the right tracks your progress through each step.
Once you click Create Virtual Machine, the VM is provisioned and begins booting. You can monitor its status from the Virtual Machines list.
After creation, the VM appears in the Virtual Machines list where you can track its status, resources, and uptime.
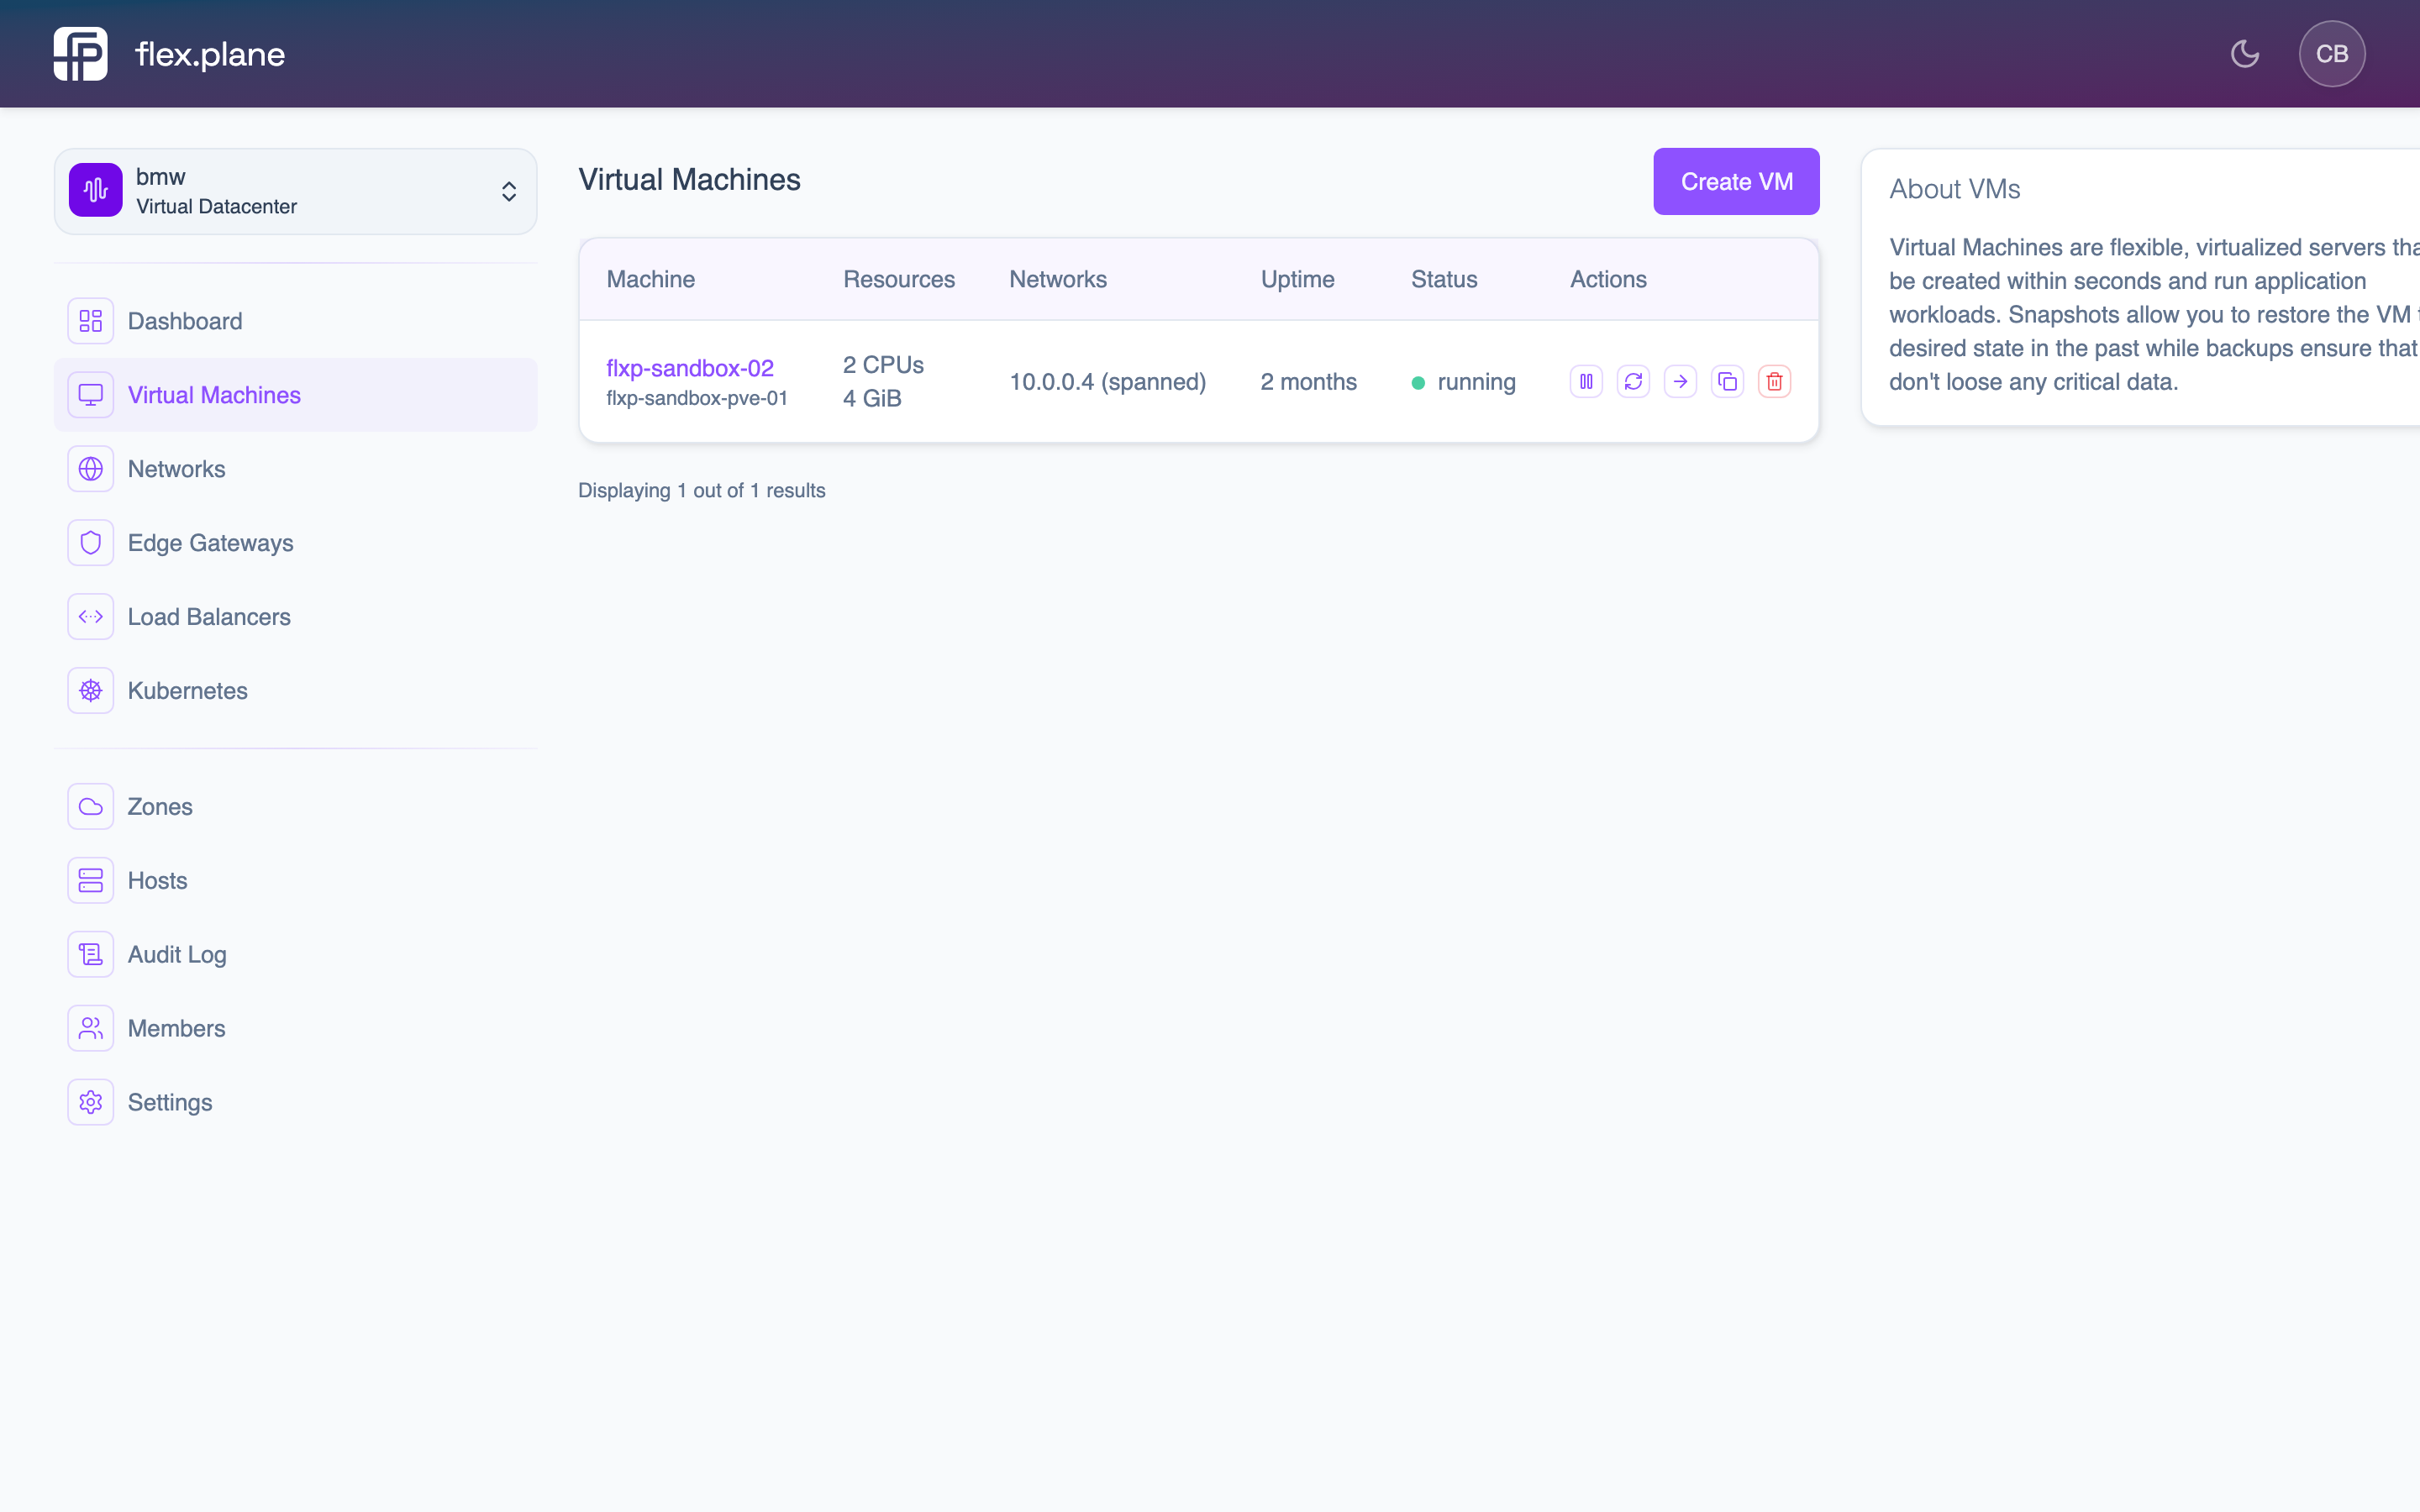 The Virtual Machines list displays each VM's resources, connected networks, uptime, status, and quick action buttons.